Real Use Cases

What Can You Actually Do With This?

Not a list of features. Real scenarios showing how the platform works — from a problem you recognise to a result you can open on your board.

Document Existing UX Flows with AI

Automatic Domain Discovery using Claude Code — on autopilot, in ~15 minutes

⚡ ~15 min total 🤖 Zero manual screenshots 📋 Zero documentation effort 🔍 Finds things you didn't know were there
👩‍💼

Sara is a software architect. In two days she has a domain modeling workshop with the business team. The agenda: map out how their Customer Onboarding flow actually works so they can redesign it. Normally she'd spend a morning taking screenshots, writing descriptions, and organizing them into something usable. She tries something different instead.

⏱ The old way — 3–4 hours
  • Taking screenshots of every screen, one by one
  • Writing descriptions for each step by hand
  • Organizing flows into a logical structure
  • Missing edge cases nobody thought to check
  • Result is subjective — you document what you think matters
  • Boring. Easy to skip. Often done badly.
⚡ With AI Discovery — 15 minutes
  • Agent navigates every visible flow automatically
  • Screenshots taken at every meaningful screen transition
  • Placed directly on the board as a visual storyboard
  • Finds paths nobody thought to look for
  • Objective — it sees the product like a first-time user
  • Fully on autopilot. You go make coffee.
How Sara did it — step by step
1
Install the agent kit
One command sets up everything — agent loop, board connection, skills installed in Claude Code: npx @eventmodelers/agent-modeling-kit@latest install
2
Add the Chrome DevTools MCP
Gives Claude Code a real browser to navigate with: claude mcp add chrome-devtools --scope user -- npx chrome-devtools-mcp@latest
3
Run /discover-storyboard — answer two questions
Claude asks: "What URL?" and "Any guidance?". Sara types https://app.hercompany.com and "Focus on the customer onboarding flow." Then she goes to make coffee.
4
The agent navigates, screenshots, and documents — like a real user
Claude opens the browser, clicks through every flow, fills forms with plausible test data, and at every meaningful screen transition takes a screenshot and writes: what it shows, how the user got there, what they can do next.
5
The board is ready — 9 screens, 3 timelines, zero effort
Sara opens Eventmodelers. Three chapters are there — each with real screenshots and descriptions. The workshop can start immediately. No blank canvas, no "so where do we begin?"
What appeared on the board — screens the agent discovered automatically
Login Page
Login & Registration
Signup Form
Login & Registration
Email Verification
Login & Registration
Onboarding Wizard — Step 1
Onboarding Wizard
Onboarding Wizard — Step 2
Onboarding Wizard
Onboarding Wizard — Step 3
Onboarding Wizard
Dashboard — First Visit
First Dashboard Experience
What Sara discovered — things nobody had noticed
🔎
The "Resend email" button is almost invisible
The agent documented it: "user can resend verification email (small text link at the bottom)." Sara's team had never discussed this. It went on the workshop agenda.
🔀
The wizard asks company size before company name
Seeing the sequence documented objectively made it obvious. Someone immediately said: "Wait, that's backwards." No one had noticed because they all knew what the wizard was supposed to do.
👆
The dashboard has 6 competing calls-to-action
The agent listed all six possible actions on the first-time dashboard. Seeing them all written together made the problem impossible to argue with.

The agent didn't read the docs or the code. It looked at the actual product, the way a real user would. And it built a starting point for the workshop in 15 minutes, on autopilot. Domain discovery doesn't have to mean writing boring documentation. Sometimes it just means letting an agent show you what's really there — including the things you didn't know were broken.

Try the Platform Free → Read the Agent Docs Requires Claude Code + Chrome DevTools MCP

Model Before You Code — Understand Your Business Case with an Agent

Run the full Event Modeling workflow in one conversation — and discover what the business actually needs before anyone writes a line of code

🗣️ One conversation, 9 structured steps 🔍 Surfaces gaps before they become bugs 📐 Complete model, ready for code generation 🤝 Works with domain experts in the room
👨‍💻

David is a senior developer about to start a new feature: a subscription management flow for a SaaS product. The business gave him a one-pager, a Figma mockup, and a Confluence doc with bullet points. He has sprint planning in two days. He types /orchestrate-event-modeling and answers five questions.

⏱ The old way — build first, regret later
  • Read the requirements doc, nod, assume you understand it
  • Open the IDE, start with the database schema
  • Discover mid-sprint that "subscription" means three different things to three people
  • Find missing edge cases in QA — or in production
  • Refactor the model after the business changes their mind about what "cancelled" means
  • Half the spec is implicit knowledge nobody wrote down
⚡ With /orchestrate-event-modeling
  • Agent interviews you about the domain — fills gaps immediately
  • Brainstorms every event the system could produce
  • Sequences events into a coherent narrative before you touch any code
  • Builds UI storyboards showing exactly what data flows where
  • Generates Given-When-Then specs for every command — including failures
  • Validates the model and catches structural problems before sprint 1
How David did it — step by step
1
Install the agent kit
One command sets up everything — skills installed in Claude Code, board connection configured: npx @eventmodelers/agent-modeling-kit@latest install
2
Run /orchestrate-event-modeling — answer five questions
The agent opens with a short interview: "What are you modeling?", "What's your goal — learning, production code, or design validation?", "Any constraints?". David pastes in the requirements doc and answers in plain English. The agent confirms its understanding before touching the board.
3
The agent runs 9 structured steps — one at a time
Step 1 brainstorms every domain event. Step 2 sequences them. Step 3 sketches the UI storyboard. Steps 4 and 5 identify commands and read models. Step 7 writes Given-When-Then specs for every command — not just happy paths. At each step, the agent asks targeted questions and writes phase summaries before moving forward.
4
The agent builds the board in real time
Every event, command, read model, and scenario spec is placed directly on the Eventmodelers board as the conversation progresses. David can open the board at any point and see the model taking shape — timelines filling in, screens appearing, spec cells populating.
5
Validation pass — PASS verdict, model ready
Step 9 runs a completeness and consistency check. Every field has an origin and a destination. Every command has scenarios. The agent returns a PASS verdict and writes a summary. David goes into sprint planning with a board he can share — not a requirements doc that three people will interpret differently.
What David discovered — before writing a single line of code
💥
There was no event for a failed payment retry
The agent's scenario step asked: "What happens when the payment processor returns a transient error?" Nobody had written this down. It would have been discovered in production — or not at all, silently swallowing failures.
🔀
"Cancelled" meant three different things to three different people
The event brainstorm surfaced SubscriptionCancelled, SubscriptionPendingCancellation, and SubscriptionImmediatelyCancelled as distinct events. Seeing them side by side forced the first real conversation about what the product actually does at end-of-billing-period. That conversation had never happened before.
📐
The storyboard revealed a missing read model
The UI storyboard step drew the subscription management screen and listed every field it needed to display. One field — the next billing date — had no event that produced it. The agent flagged this in the completeness check. Without the model, this would have become a last-minute backend scramble.

The agent didn't write the code. It asked the right questions — the ones that expose assumptions, reveal missing events, and force the team to agree on what "cancelled" actually means. That conversation, structured into 9 steps, is worth more than a sprint of code written against a misunderstood spec. Model first. Code second.

Try the Platform Free → Read the Agent Docs Requires Claude Code + the modeling kit installed

Run Meetings That Actually Produce Something

A shared board as the agenda, the whiteboard, and the minutes — all at once

📋 Visual agenda, not a bullet list 🔁 Every change is recorded and replayable ✅ Clear outcomes after every session 🚫 No more meaningless agendas
👥

The team used to start every refinement with the same question: "So — where were we?" Twenty minutes gone before a single decision. Now the first thing anyone does when a meeting starts is open the board. The model is the agenda. What's on it drives the conversation. What changes during the session is captured automatically. The meeting ends with something tangible — every time.
⏱ The old way — talking in circles
  • Agenda is a list of topics — nobody knows what "discuss payments" means
  • Half the meeting is reconstructing context from last time
  • Decisions happen but nobody wrote them down the same way
  • Whiteboard gets erased, sticky notes get lost
  • Follow-up email tries to summarise — different people remember it differently
  • Next meeting starts from scratch again
⚡ With a shared model board
  • Open the board — the model is the agenda, visually
  • Context is immediate: everyone sees what was there before
  • Changes made during the session are recorded as they happen
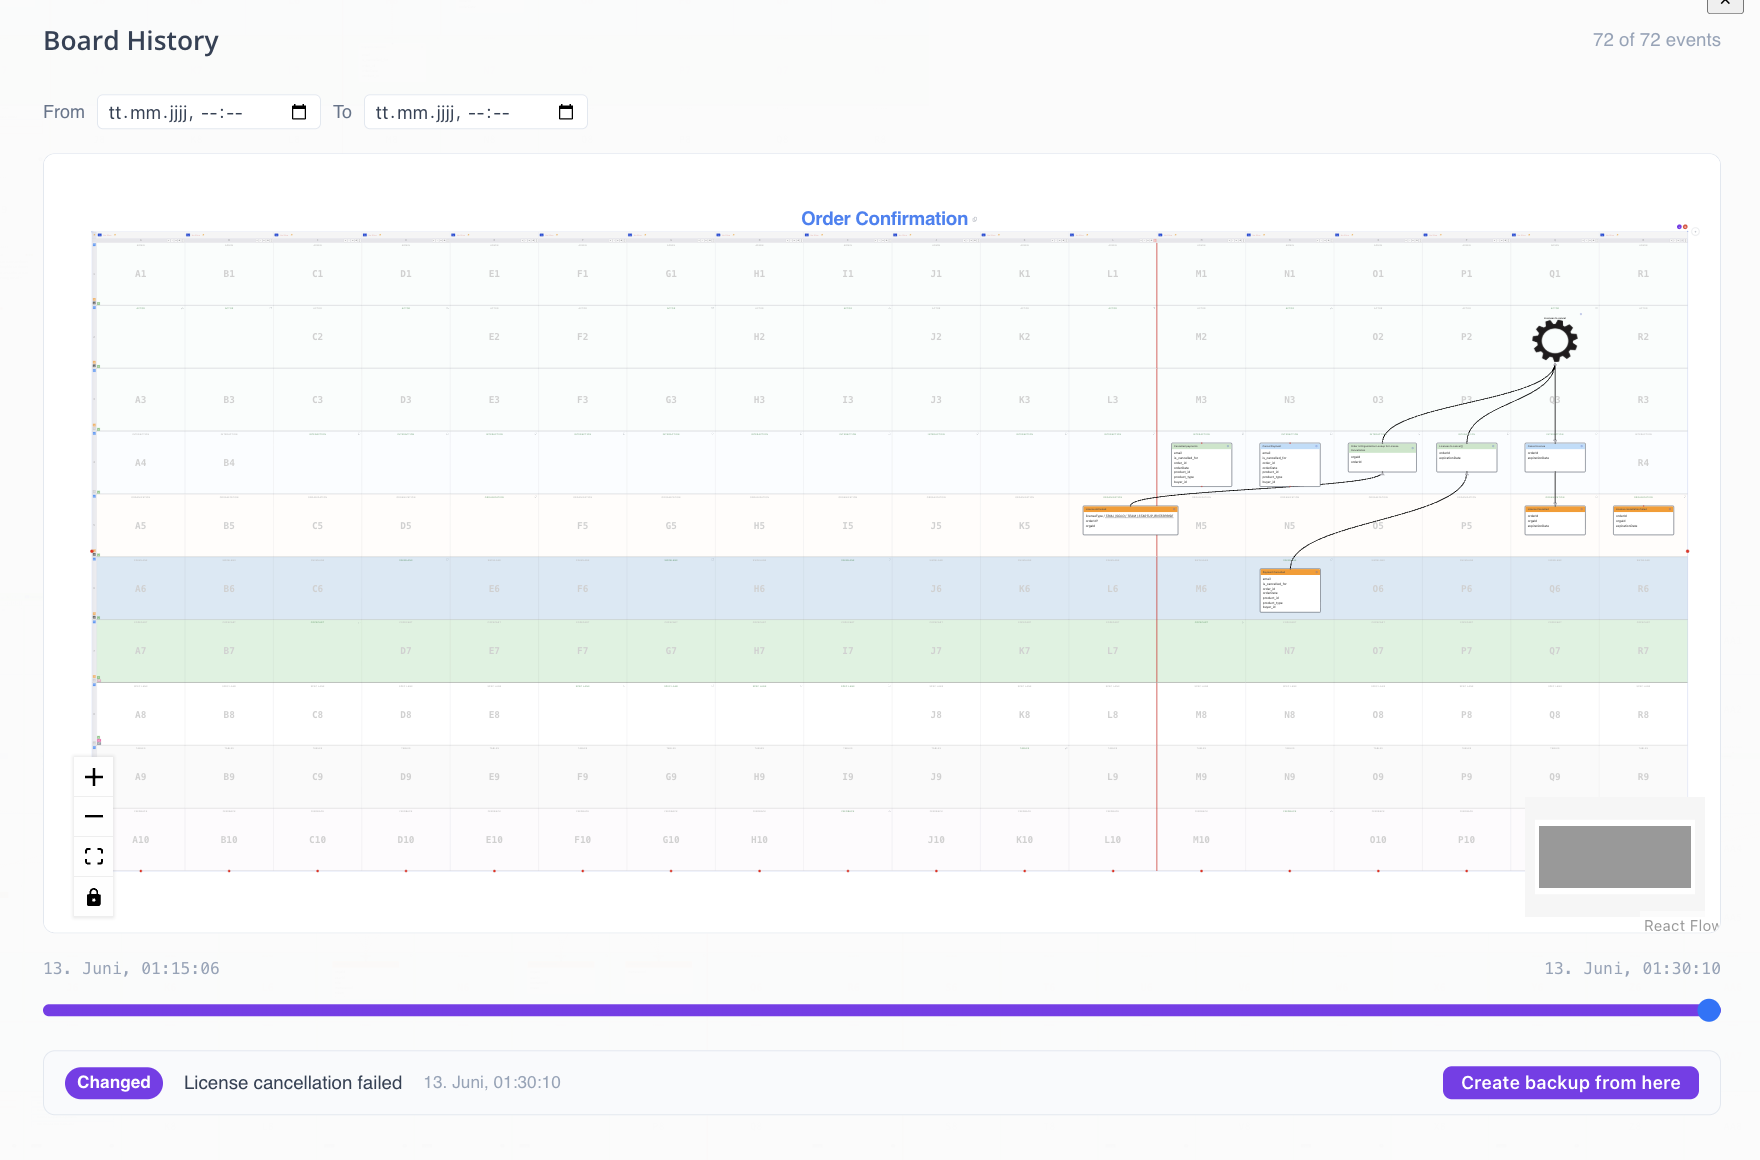
  • Board history lets you replay every move after the fact
  • Export a screenshot at the end — your meeting minutes, done
  • Next meeting picks up exactly where this one left off
How a session unfolds — from opening to outcome
1
Open the board — the model is already there
No deck, no document, no "let me share my screen." The board is open, the timeline is visible, the context from last session is still there. The conversation can start immediately.
2
The model guides every discussion
Instead of abstract topics, the team points at specific events, commands, and flows. "This command — what happens if it fails?" is a better question than "So, about the payment flow…". The visual structure keeps the conversation grounded.
3
Every change lands directly on the board
A new event gets added. A command gets renamed. A missing read model gets flagged. All of it goes onto the board in real time — not into someone's notebook to be typed up later.
4
Board history records every move automatically
Every change to the board is captured — who moved what, when. After the session you can scrub through the full history and replay exactly how the model evolved. Nothing gets lost. Even the reasoning behind a decision is visible in the sequence of changes.
5
Export a screenshot — your meeting minutes in one click
At the end of the session, one person exports a screenshot of the board. That's the summary. Not a write-up. Not an email. The model speaks for itself — and everyone who was in the room already agreed on what's on it.
Board history — every change recorded and replayable
Board history showing all recorded changes with a timeline scrubber
What the team discovered — once meetings had structure
🗣️
Conversations became specific instead of circular
When the agenda is a visual model, vague topics disappear. You can't have a 20-minute debate about "the subscription flow" when the flow is right there on screen. Either the model is right or it isn't — and the team can see which.
Board history settled a dispute no one remembered
Two weeks after a session, the team disagreed on whether a particular event had been intentionally removed or accidentally deleted. They opened the history, scrubbed to that moment, and saw exactly what happened — and why. Case closed in 90 seconds.
📋
Nobody writes meeting minutes anymore
The screenshot at the end of each session replaced the follow-up email that nobody read anyway. The board is the record. If a decision isn't on the board, it didn't happen.

The board doesn't just capture what the team decided — it changes how they talk. When everyone is looking at the same visual model, the conversation becomes about the model. Not about opinions, not about who remembers it differently. The structure is the discipline. And every meeting ends with something real: a board that reflects what was agreed, recorded change by change.

Try the Platform Free → See the Board in Action Real-time collaboration · History included in all plans

Build Directly from the Model

Mark a slice as Planned on the board — the agent implements it, runs the tests, commits, and marks it Done. Automatically.

🤖 Fully autonomous implementation ✅ Tests run before every commit 📋 Board stays in sync with the code 🔁 Slice by slice, no manual handoff
👨‍💻

Alex has a complete Event Model on the board — events, commands, read models, and Given-When-Then specs from the session last week. The team has agreed on the model. Now it's time to build. Alex installs the build kit, starts the agent loop in a terminal, and goes back to the board. He marks the first slice Planned. Three minutes later he gets a notification: the slice is Done.

⏱ The old way — model on the board, code written by hand
  • Developer reads the model, translates it into code manually
  • Context switches between the board and the IDE constantly
  • Edge cases from the model get missed in the implementation
  • Tests are written separately — or skipped entirely
  • Status tracking is a separate manual step nobody enjoys
  • The model drifts from the code the moment the sprint starts
⚡ With a Build Kit
  • Agent reads the slice definition directly from the board
  • Implements command handlers, projections, or automations — correctly typed
  • Runs build and test before every commit
  • Commits with a meaningful message, merges to main
  • Sets slice status to Done on the board automatically
  • The board always reflects the true state of the codebase
How Alex did it — step by step
1
Install the build kit for your stack
One command installs the agent loop, skills, and board connection inside your project. Choose the kit that matches your backend: npx @eventmodelers/build-kit-node install for Node.js, npx @eventmodelers/build-kit-axon install for Axon/Java, or npx @eventmodelers/build-kit-supabase install for Supabase. The installer asks for your API token and Organization ID — everything else is automatic.
2
Start the agent loop
Open a terminal and start the ralph loop: cd .build-kit-node && ./ralph.sh. The loop polls for work every few seconds. Optionally start the realtime agent in a second terminal — it subscribes to board events over Supabase Realtime so the loop reacts instantly the moment a slice status changes, without any polling delay.
3
Mark a slice Planned on the board
Open your Eventmodelers board, find any slice — a command handler, a projection, an automation — and set its status to Planned. That single action is the only trigger. Within seconds, the realtime agent picks up the change, writes a task, and the loop fires.
4
The agent fetches the slice definition and implements it
Phase 1 loads the full slice definition from the board — events, commands, fields, Given-When-Then specs — and writes it to .slices/. Phase 2 reads it, determines the slice type, and runs the matching skill: /build-state-change for command handlers, /build-state-view for projections, /build-automation for reactors. The slice status flips to InProgress on the board the moment the agent starts.
5
Tests pass, commit lands, board turns green
The agent runs npm run build and the slice test suite. If everything passes, it commits with feat: <slice name>, merges to main, updates the slice status to Done on the board, and immediately starts watching for the next Planned slice. Alex's board turns green, one slice at a time — no manual handoff at any step.
Available build kits
Choose the kit that matches your stack
build-kit-node
Node.js / TypeScript backends
build-kit-axon
Java / Axon Framework (event sourcing)
build-kit-supabase
Supabase / PostgreSQL backends
What Alex discovered — once the loop was running
📋
The model became the spec, not just the diagram
Because the agent reads Given-When-Then scenarios directly from the slice definition, the scenarios the team wrote during modeling became the actual test cases. The gap between "what we modeled" and "what the tests verify" disappeared completely.
🔀
A missing field surfaced immediately — not in QA
The build step failed when implementing a projection because a field referenced in the read model had no producing event. The agent flagged it, Alex updated the model, re-exported, and the loop retried. The gap was found in seconds — not three sprints later in a regression.
🤖
The board became the source of truth for both the model and the code
Every Done slice on the board meant exactly one thing: code merged to main, tests passing. There was no more "the model says X but the code does Y." The loop kept them in sync automatically — and the history on the board made it clear exactly when each piece had been built.

The model isn't documentation anymore. It's a build specification. Every event, command, and read model you place on the board is something the agent can implement — correctly, with tests, without you touching the IDE. The distance between we agreed on the design and the feature is in main collapsed from days to minutes.

Try the Platform Free → Read the Build Kit Docs Requires Claude Code · Node.js, Axon, or Supabase project

Change the Model, the Code Catches Up

Update a slice definition on the board, reset its status to Planned — the agent rewrites the existing implementation to match. The model is always the source of truth.

✏️ Model change is the only input 🔄 Existing code rewritten to match ✅ Tests verify the new behaviour 📋 Board and code stay in sync
👩‍💻

Lena is three weeks into the build. Several slices are already Done — command handlers implemented, tests passing, board green. Then the business comes back: the OrderPlaced event needs two new fields, the projection that reads orders needs to expose them, and the command that places an order needs an extra validation rule. In the old world this means reading the code, finding every place the event is used, updating each one, hoping nothing is missed. Lena opens the board instead.

⏱ The old way — chase the change through the code
  • Find every file that touches the changed event or command
  • Update each one manually — hoping you didn't miss a consumer
  • Update the tests by hand — or skip them and regret it later
  • Update the documentation separately — it drifts immediately
  • The model on the board is now wrong — nobody updates it
  • Code and model diverge from the moment the change lands
⚡ With the model as source of truth
  • Update the slice definition on the board — add fields, change rules
  • Reset the slice status to Planned
  • Agent reads the new definition and rewrites the implementation
  • Runs build and tests against the updated spec — verifies correctness
  • Commits, sets status back to Done
  • Board and codebase reflect the same reality — automatically
How Lena did it — step by step
1
Update the slice definition on the board
Lena opens the PlaceOrder slice on the board and makes the changes the business asked for: adds discountCode and shippingTier to the OrderPlaced event, adds a validation rule to the command ("discount code must be active"), and updates the Given-When-Then scenario to cover the new failure case. The change takes four minutes. The board is now accurate.
2
Reset the slice status to Planned
One click on the status chip — DonePlanned. That single action is the trigger. The realtime agent picks up the change within seconds and writes a task for the build loop. No command to run, no script to invoke. The board event is the instruction.
3
The agent reads the new model and rewrites the slice
The loop fires, sets the slice to InProgress, and fetches the updated definition from the board. It reads the existing implementation in .slices/, compares it with the new spec, and runs /build-state-change against the updated definition. The agent does not patch around the old code — it implements the slice correctly according to the current model. What the model says is what the code does.
4
Tests run against the new spec — including the new failure scenario
The agent runs npm run build and the slice test suite. The new Given-When-Then scenario — "Given an inactive discount code, When PlaceOrder is submitted, Then the command is rejected" — is tested as part of the standard test run. The test was written on the board; the agent made sure it passes in the code.
5
Commit lands, board turns green again
Tests pass. The agent commits with feat: update PlaceOrder — add discountCode, shippingTier, validation rule, merges to main, and sets the slice back to Done on the board. Lena opens the board. Green. She opens the code. It matches what the board says. She didn't touch the IDE once.
What Lena discovered — once the model owns the change
🔄
Changing the model felt safer than changing the code
When the model is the source of truth, the right place to make a change is obvious. You don't open the IDE and hope you found every callsite. You update the definition on the board — one place, fully visible — and let the agent propagate it into the code. The change is auditable before a single line is written.
🧩
The projection needed updating too — the board made that obvious
When Lena added the new fields to OrderPlaced, she could immediately see on the board that the OrderSummary read model didn't expose them yet. She updated that slice definition as well, reset it to Planned, and the agent updated the projection in the same loop run. The board made the dependency visible before the code had to break to reveal it.
🚫
Nobody patched the code directly — and that mattered
On a previous project, a developer had added a quick field directly in the code without updating the model. Three months later the board said one thing and the code did another. Nobody knew which was right. This time, the rule was explicit: if it's not on the board, it doesn't belong in the code. The model is the spec. Always.

The model isn't a diagram you draw once and forget. It's a living spec — and when it changes, the code changes with it. Not the other way around. Resetting a slice to Planned isn't undoing work: it's telling the agent that the definition has changed and the implementation needs to catch up. That discipline — model first, code follows — is what keeps the board and the codebase telling the same story, sprint after sprint.

Try the Platform Free → Read the Build Kit Docs Requires Claude Code · Build kit installed · Agent loop running

Sketch User Flows Directly on the Board

Draw screens in minutes with the built-in sketch tool — align them on the event timeline, discuss flows with the team, and let AI build from what you sketched

🖊️ Screens drawn in minutes, not hours 📐 Aligned directly on the event timeline 💬 Discussions grounded in real screens 🤖 AI builds from what you sketched
🎨

Julia is a product designer sitting in a refinement session with two developers and a business stakeholder. They're trying to nail down a payment confirmation flow before anyone starts coding. Normally this means pulling up Figma, waiting for everyone to get the right link, arguing about prototypes, then someone screenshares — and half the screen is tool UI, not the actual design. Today Julia opens the sketch tool directly on the board. Ten minutes later there are four screens on the timeline, the team is pointing at specific UI elements, and the developer is already reading the model to see what data each screen needs.

⏱ The old way — design tool, then handoff, then rework
  • Switch to Figma, find the right frame, share the link
  • Everyone sees the screens but not the flow context
  • Discussions happen in comments, Slack, and meetings separately
  • Developers interpret the design independently — differently
  • Screen changes don't update the model or the spec
  • Handoff is a separate artifact the dev has to translate
⚡ With the built-in sketch tool
  • Open the sketch tool directly on the board — no tab switching
  • Draw screens with shapes, labels, and arrows in minutes
  • Export each screen to the board, aligned on the event timeline
  • Everyone sees the screens in flow context, side by side with events
  • Discuss directly — annotations land on the board, not in a chat
  • AI reads the screens as part of the model — and builds from them
How Julia did it — step by step
1
Open the sketch editor directly on the board
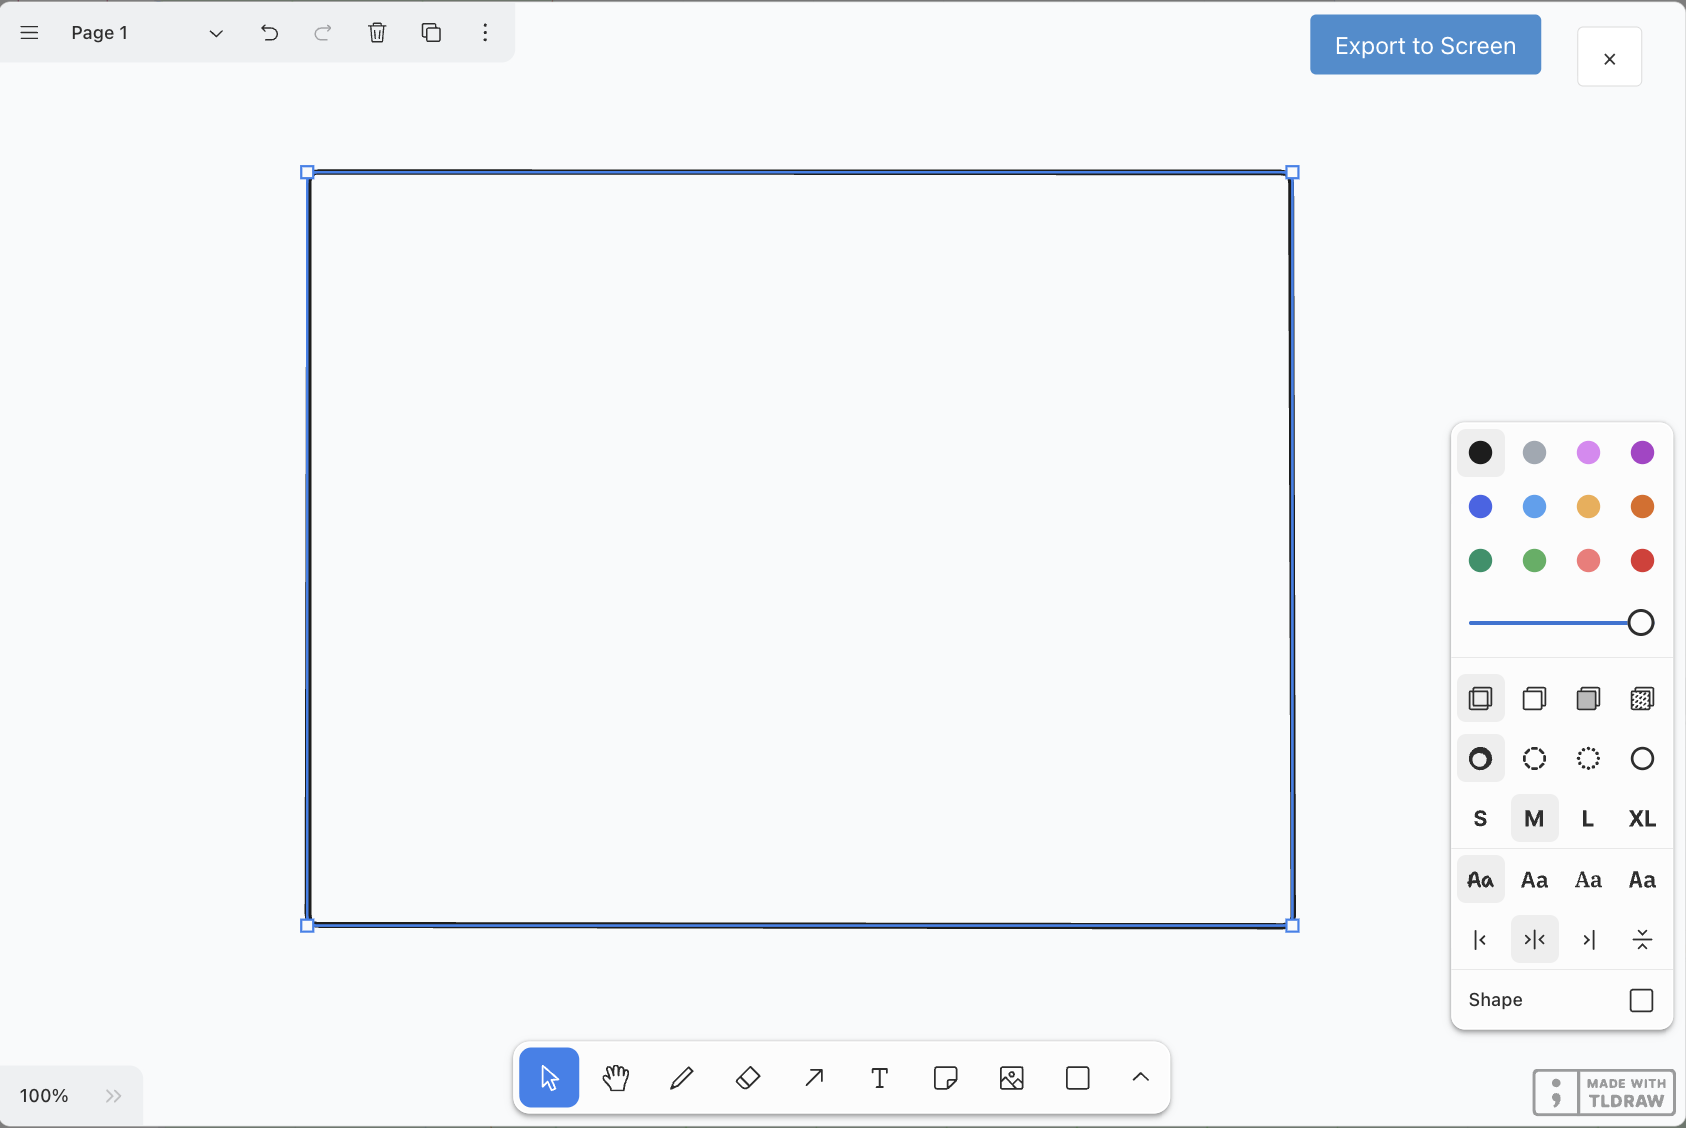
From any screen cell on the event timeline, Julia opens the built-in sketch editor — a full drawing canvas with shapes, freehand tools, text, arrows, and color. No Figma account. No sharing links. Everyone in the session can watch as she draws in real time.
2
Sketch each screen in minutes — not hours
Julia uses rectangles for UI containers, labels for field names, and arrows to show navigation. The goal isn't pixel-perfect design — it's communicating the flow clearly enough that everyone in the room can agree on what each screen shows and what the user can do. A wireframe that takes four minutes beats a polished mockup nobody reviewed.
3
Export each screen to the board with "Export to Screen"
One click per screen — the sketch is captured and placed directly onto the event timeline as a screen element. Julia sketches the Confirm Payment screen, exports it, sketches the Confirmed Payments view, exports it. The board fills with real screens, aligned with the commands and events they belong to.
4
Align screens on the timeline — the flow becomes visible
With all screens placed on the board, the team can see the entire payment flow at once: which actor sees which screen, what command each form triggers, which events produce the data each screen needs to display. The discussion changes instantly — it's no longer about abstract requirements, it's about specific fields, specific actors, specific states.
5
Let AI read the screens and build from them
Once the screens are on the board, the AI agent can read them as part of the full slice definition. The sketch communicates what data each screen expects, what actions it exposes, and how it connects to the event flow. The agent uses this to generate UI scaffolding that matches what was drawn — no interpretation gap between design and implementation.
The sketch editor — draw screens directly inside the board
Built-in sketch editor with drawing tools, shapes, and color palette
Screens exported and aligned on the event timeline
Multiple sketched screens placed and aligned on the event modeling board timeline
What Julia discovered — once screens lived on the board
🎯
Discussions became concrete in seconds
When the Confirm Payment screen appeared on the board next to the ConfirmPayment command, the developer immediately asked: "Where does the Order ID come from? There's no event that produces it yet." That question had never surfaced in three previous meetings. Seeing the screen next to the model made the gap impossible to miss.
📐
Two screens turned out to serve the same read model
Julia sketched the Confirmed Payments list view and the Payment Detail modal separately. When both were on the board, the developer noticed they displayed identical fields — just at different levels of detail. One read model, not two. That insight cut two slices from the backlog before anyone wrote a line of code.
🤖
The AI generated UI code that matched the sketches
After the session, the team marked the first slice as Planned. The agent read the screen sketch as part of the slice definition and generated a UI component that matched the layout Julia had drawn — correct field names, correct actor, correct command wired up. Nobody had to describe the UI in text. The sketch was enough.

A sketch on a whiteboard disappears when the meeting ends. A sketch on the event modeling board becomes part of the specification — aligned with the command it belongs to, visible to every developer who reads the model, and readable by the AI agent that builds from it. You don't need Figma to communicate a UI. You need the right screen in the right place, on the right timeline.

Try the Platform Free → See the Sketch Tool Built-in sketch tool · No external design tool required

More use cases in progress — join the newsletter to be notified when the next one lands.