
One page, five elements, four patterns, twenty rules. Everything you need on the wall during a workshop - now interactive, so you can click through it instead of squinting at a PDF.
Need the PDF? Get it here for free →
Why: a model only creates shared understanding if "command" and "event" mean the same thing to everyone in the room. These five definitions are the common ground that collaborative language is built on.
Every board is built from just five shapes. Tap a card to see the full definition and an example.
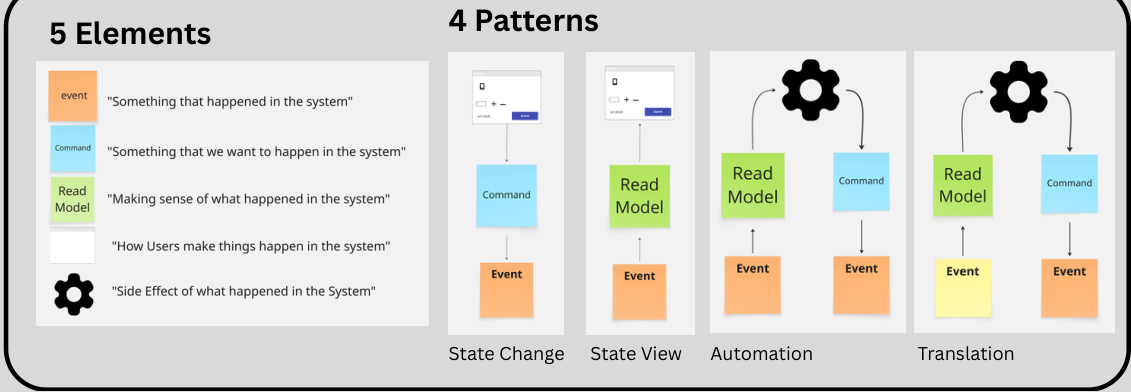
Why: once you recognize which of the four shapes you're looking at, you instantly know what question to ask next - and which anti-pattern to watch for.
Every slice on an Event Modeling board is built from exactly one of these four shapes. Pick a pattern to see how it fits together.
A user - or another system - submits a Command. If the business rules allow it, the system produces one or more Events that record what just changed. This is the write side of Event Modeling: the moment intent becomes fact. Watch for the "left chair" anti-pattern if a single command starts producing a long, unrelated list of events.
Events accumulate over time. A State View pattern folds them into a Read Model that answers one specific question for one specific screen or API consumer. This is the read side - no command involved, just events being interpreted into something usable.
An Event builds a Read Model, same as State View. But instead of a screen reading it, the gear icon - a computer, not a human - watches that Read Model and decides to issue a Command automatically: a reminder email three days before a trial ends, a retry after a failed payment. That Command produces a new Event, same as State Change. No human in the loop at any point.
The same shape as Automation, but the incoming Event comes from outside - another bounded context or an external system. It builds a Read Model, the gear reacts to it and issues a Command, and that Command produces a new Event phrased in the receiving context's own language. It's an anti-corruption layer drawn directly on the model - it keeps teams decoupled, because nobody has to understand another team's internal model.
Why: a diagram everyone nods along to isn't a spec - it's still open to interpretation. Given-When-Then is unambiguous, testable, and something an AI agent can build directly from.
Every pattern can be written as Given-When-Then - the exact format a developer, or a coding agent, can turn straight into a test.
Why: catching one of these during the workshop costs you a five-minute conversation. Catching it after the sprint starts costs you a redesign.
Named after the furniture they resemble on the board. Expand each one to see what it usually means.
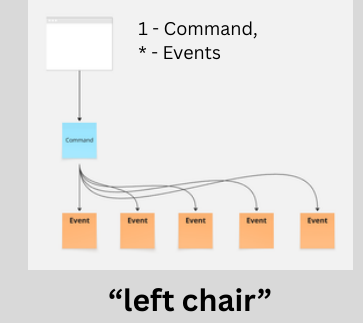 A single Command fans out into a pile of unrelated Events - four skinny legs holding up one seat. It's not automatically wrong; some commands genuinely produce several events. But it's worth asking whether the command is doing too much, or whether some of those events actually belong to a different slice entirely.
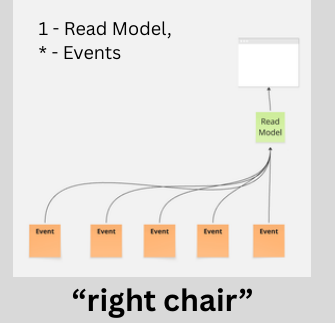 The same shape, upside down: a single Read Model built from a long tail of Events. Ask whether the Read Model is trying to answer too many questions at once - a good Read Model usually answers exactly one, cleanly.
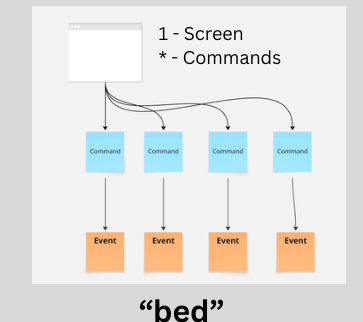 One screen firing off a wide spread of Commands - a bed frame with too many legs. Often a sign the screen is doing the job of several screens, or that some of those commands could be collapsed into one clearer user intent.
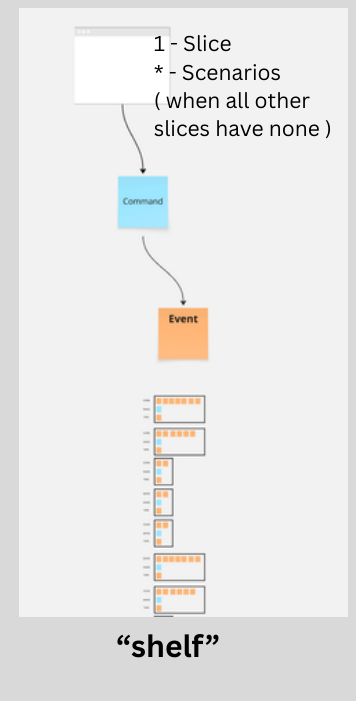 One slice on the board is loaded with Given-When-Then scenarios while every other slice has none - a single shelf holding everything because nobody built the rest of the shelving unit. Usually means scenario coverage was written for the easiest slice first and never caught up with the rest of the model.
Why: most "it works on my machine" bugs trace back to someone skipping a link in this loop - usually a screen built before the Read Model that's supposed to feed it exists.
Straight from the cheat sheet - then try the interactive version below: click each stage to see its role in the loop.
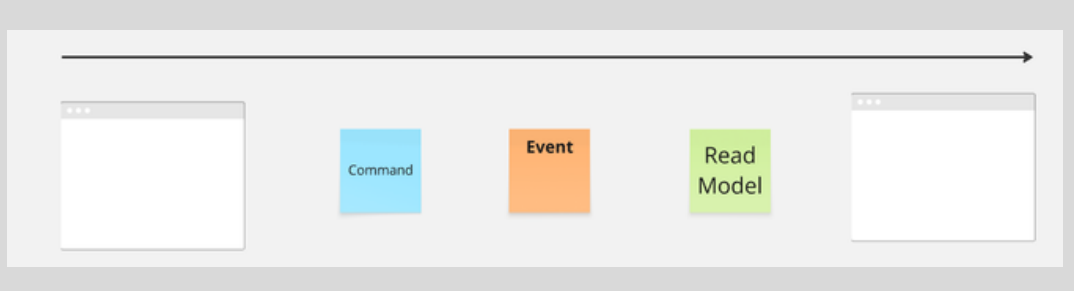
Swimlanes can be Teams or Systems - draw a horizontal lane per owner and slot every Event into the lane of whoever owns that data. Swimlanes indicate ownership of Events. If another team needs that data, they read it via a Translation slice, not by reaching into someone else's database.
Why: skipping a step doesn't save time - it just moves the confusion to week three of the sprint, where it's far more expensive to untangle.
Each step builds on the last. Expand a step to see its goal and how to actually run it in the room.
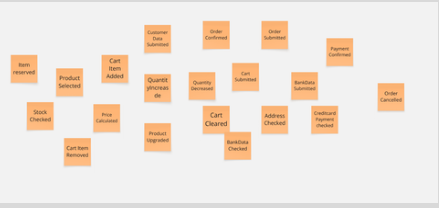 Hand everyone orange stickies and ask a simple question: "What happened?" No structure yet, no order - just get every event anyone can think of onto the wall. Quantity over precision here; you'll sequence and merge duplicates in the next step.
 Take the pile of events from step 1 and arrange them in a rough left-to-right timeline. Ask the two anchor questions every time: "What's the first event?" and "What's the last event?" Once you have a beginning and an end, the middle fills in naturally.
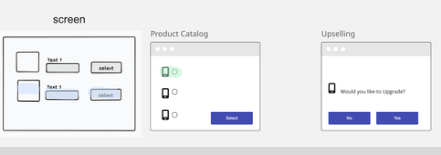 Sketch a simple wireframe screen above the events a user would actually see at that point in the flow. This is where business and engineering stop talking past each other - a screen makes the abstract event timeline concrete for everyone in the room.
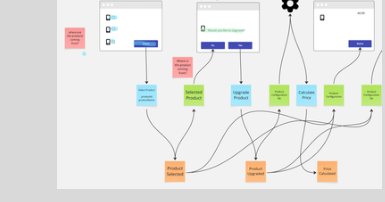 Add Commands below the screens and Read Models above them, and draw the arrows: Screen reads Read Model, Screen sends Command, Command produces Event, Event feeds Read Model. This step exposes every place a screen needs data that no event currently produces - the most valuable gaps to find before anyone writes code.
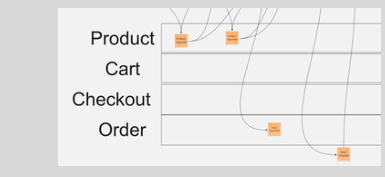 Draw horizontal lanes for each team or system, and slot every event into the lane of whoever owns that data. Ownership questions that were implicit before - "wait, who's actually responsible for this?" - become impossible to avoid once the lanes are drawn.
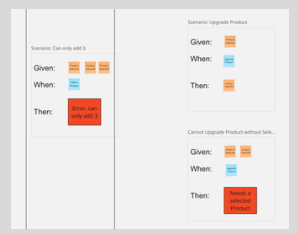 For each slice, write Given-When-Then scenarios - the happy path first, then the error cases. Ask three times: "Is there any rule we didn't cover?" Business rules that used to be tribal knowledge get written down as literal test cases, ready to hand to a developer or an AI agent.
Two questions carry the whole workshop: "What's the first event? What's the last event?" to find the plot - and "Is there any rule we didn't cover?", asked three times, to close the gaps.
Why: none of these are enforced by a compiler. They're enforced by whoever's facilitating - which is exactly why they're worth knowing cold, not just skimming once.
These aren't laws, they're habits worth building - keep them in view during a session.
Why: a workshop with no facilitator, no clear goal, and the wrong people in the room still produces a nice-looking board - just not shared understanding. Five minutes here saves the whole session.
Walk through this with your co-facilitator before scheduling the session. Your progress is saved right in this browser.
Why: a model only the person who drew it can read isn't shared understanding. These conventions are what make a big board legible to everyone who opens it after you.
A handful of extra conventions that make bigger models easier to read - hover a status pill for its meaning.
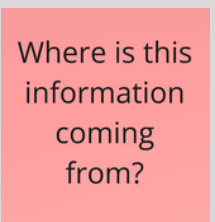
Anything unresolved - an open question, a blocker, a disputed rule, e.g. "Where is this information coming from?" - goes on a red sticky note directly on the model. It stays visible until someone answers it. A hotspot isn't a failure of the workshop; leaving it blank and moving on would be.
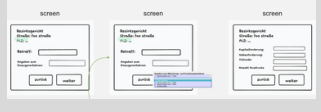
When a flow is purely navigational - no state change, no business rule - show one screen leading straight to the next, with no commands or events in between. Save the full notation for the moments that actually matter.
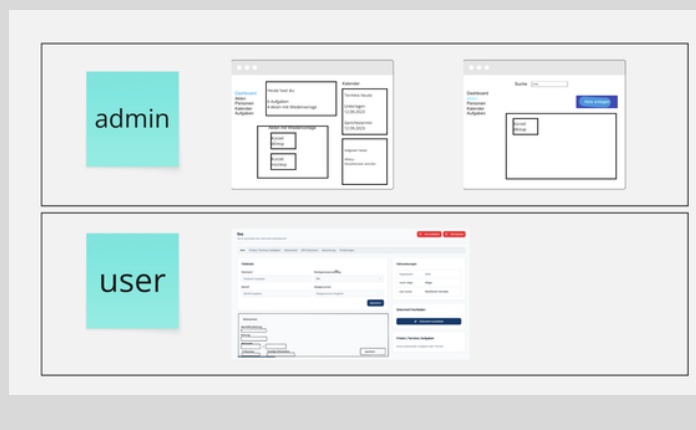
Stack actor lanes above the timeline - one per role, e.g. admin, user - so it's obvious at a glance which screens belong to which actor, and where their flows intersect.
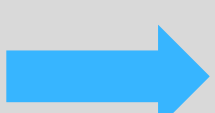
A wide blue arrow spanning several slices groups them into a named chapter - useful once a model grows past a single screen's width and needs a table of contents.
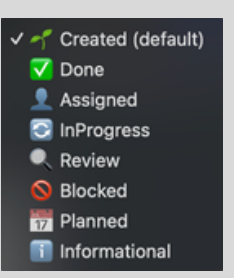
Every slice carries a status chip. Hover each one below for what it means - the same statuses your build agent watches for.
Why: the moment an agent can read the model, it stops being documentation and becomes the thing that actually gets built - which is exactly why keeping it accurate is no longer optional.
The same board that ran your workshop can hand slices straight to a coding agent. Copy a command to get started.
Installs the agent skills and board connection needed to run Event Modeling conversationally - brainstorm events, sequence them, sketch storyboards, and write Given-When-Then scenarios straight onto the board from a chat with Claude Code.
npx @eventmodelers/agent-modeling-kit@latest install
Mark a slice Planned on the board and a build kit picks it up: it reads the slice definition, implements it, runs the tests, commits, and flips the status to Done - automatically. Pick the kit that matches your stack.
npx @eventmodelers/build-kit-supabase@latest install
npx @eventmodelers/build-kit-node@latest install
npx @eventmodelers/build-kit-axon@latest install
Everything referenced on the cheat sheet, one click away.
Keep this page open on a second screen during your next session, or grab the printable PDF for the wall.